
Everything about Instagram advertising: how much it costs, how to set up campaigns in Meta Ads Manager step by step, the ad types, and how to turn ad traffic into DM conversations.
.avif)
Automate Comments and DMs in 5 Minutes
Someone comments on your IG post. They get a DM instantly. You do nothing.

Trusted by 10K+ creators and SMBs


TL;DR
TL;DR
Turn the traffic you paid for into conversations
Every DM, comment and Story reply your ads generate triggers an automatic follow-up, so no paid lead gets missed. Free plan, no card.
Instagram advertising puts your content in front of people who have never heard of your brand. The platform has around 3 billion monthly active users, and it has become a real discovery-to-purchase channel: surveys commissioned by Meta have found that a majority of people have bought a product after seeing it on Instagram. For most businesses, that reach justifies the spend. The question is how to structure campaigns so the money does not disappear into impressions with no return.
This guide covers the practical parts: how much Instagram ads cost, the five ways to run them, the ad formats, how to set up your first campaign step by step, and what to do with the traffic once it arrives.
Instagram ads are paid posts you show to a specific target audience. They appear almost like regular content, inside the Feed, Stories, Reels, Explore, and Shopping placements, and the only clear visual difference is the small "Sponsored" label under the account name.
Instagram supports several ad formats: single image or photo, video, carousel (multiple images or videos), collection ads (built for e-commerce), Story ads, Reels ads, Explore ads, and Shopping ads with product tags. That flexibility means you can design ads around your strongest asset, whether that is a single hero product, a whole collection, or a quick story-style video.
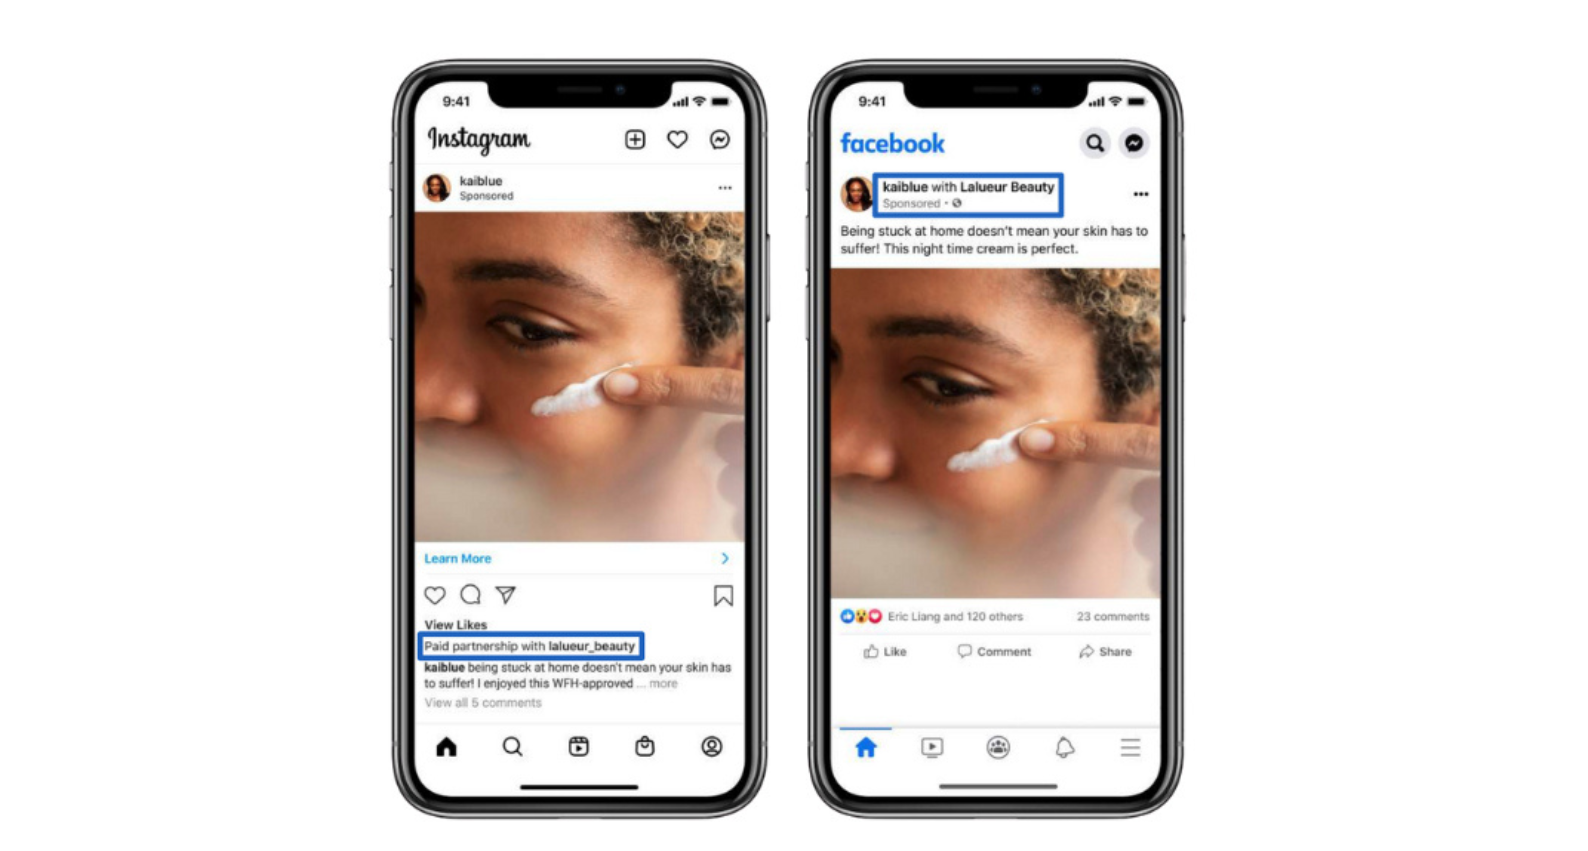
Instagram officially supports five ways to run ads, each with a different level of control.
You tap Boost post on any feed post, Reel, or Story. Audience and placement options are set automatically or with basic controls. This is the fastest way to run an ad and the least flexible, and paying with available funds on iOS adds Apple's 30% service fee. To avoid the fee, boost from instagram.com in a browser instead of the iOS app.
Boosting from instagram.com has the same features as in-app boosting but avoids the Apple service fee. Use this whenever you are boosting posts rather than building full campaigns.
If your Instagram account is linked to a Facebook Page, ads created from the Page can run on both platforms. Some audience and placement options are available, but the full Advantage+ features are only in Ads Manager.
Meta Business Suite lets you schedule posts, create basic ads, manage permissions, and view insights across Instagram and Facebook. Some Advantage+ features are available, but for the most advanced optimization, Ads Manager is the better tool.
Ads Manager gives you full control: campaign objectives, detailed audience targeting, all placement options, budget strategies, creative testing, and every Meta Advantage+ feature. For any serious advertising beyond occasional boosted posts, this is where to work.
Short answer: yes, if you target well and send users to the right next step. Instagram has become a place where people discover products, research brands, and click through for more information, and Meta's own commissioned research points to a majority of users taking some action, often including a purchase, after seeing a product on the platform. That intent is real, but it only turns into revenue if the ad points somewhere useful.
Instagram ads perform best when they show up in native formats (Reels and Stories content that feels like a normal post), target a clear and specific audience, and ask for a simple, low-friction action. "DM us QUOTE for a custom offer" on cold traffic will usually beat "Buy now." That is where DMs become powerful: instead of pushing everyone to a generic landing page, you invite them to start a conversation, which is exactly what Inrō is built to automate.
There is no fixed price list. Instagram ads run on an auction, so your costs depend on your objective (Sales and Leads often cost more than Reach), audience size and competition (a large market like the US costs more than a smaller one), how competitive your industry is, the time of year (Q4 is usually more expensive), and your bidding strategy and budget.
A common starting point among performance marketers is $5 to $10 per day per ad set, simply to give the algorithm enough data, with higher budgets buying faster learning and steadier results. You choose between a daily budget (Meta spends up to that amount each day) and a lifetime budget (Meta spreads a total over the campaign). For beginners, a daily budget in the $5 to $20 range is easier to control while you learn.
Start with a single image. It is faster to produce, easier to iterate, and gives cleaner data because there is only one variable. Once you find a message that converts as an image, replicate it as a video or Reel to test whether the richer format improves results. Testing creative and format at the same time makes it harder to understand what actually drove the outcome.
You will be working inside Meta Ads Manager, which controls both Facebook and Instagram ads. First, go to business.facebook.com, create or log into your Business Manager, and make sure your Instagram account and Facebook Page are connected.
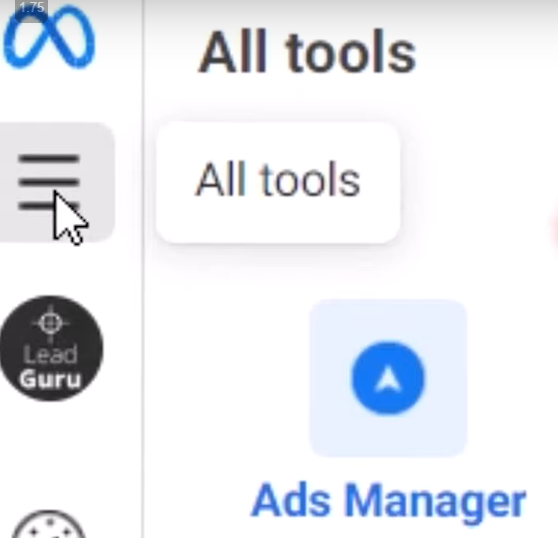
Open Ads Manager. In Business Manager, click the menu icon on the left and select Ads Manager.
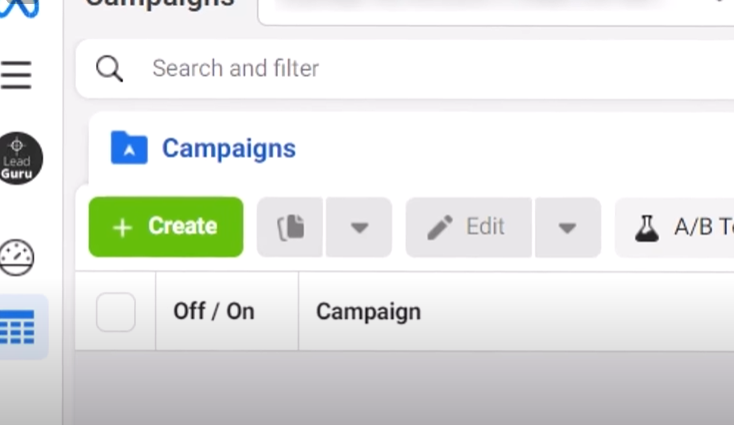
Click the green Create button. This starts a new campaign flow.
Choose your buying type: Auction. For small and medium businesses, Auction is the standard and most flexible option.
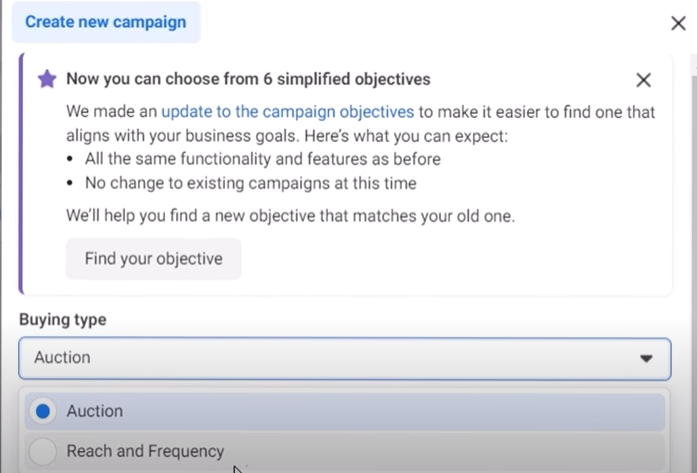
Select your campaign objective. Meta shows options like Awareness, Traffic, Engagement, Leads, App promotion, and Sales. For most business owners, choose Leads or Sales over pure Awareness, so the system knows you care about conversions, not just impressions.
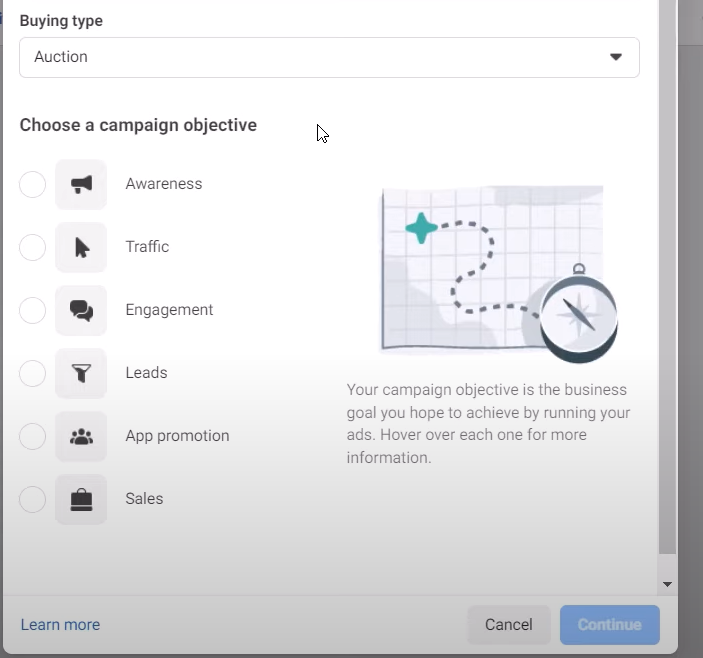
Name your campaign. Use a clear convention like IG-Sales-US-Remarketing so you can tell campaigns apart later.
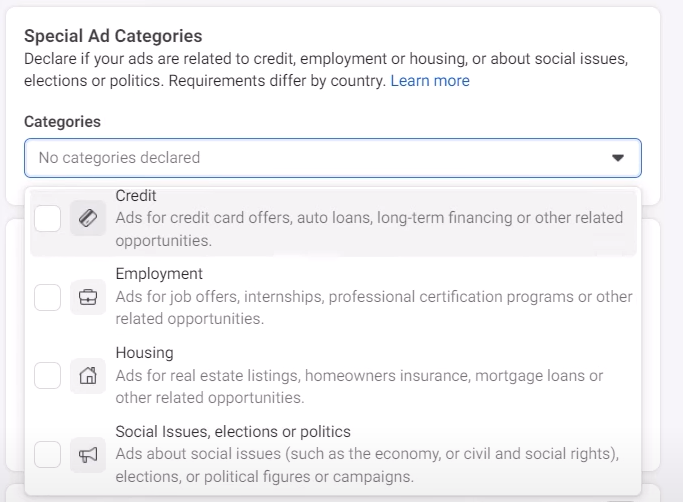
Choose a category if required. If you are in a special ad category (credit, housing, employment, politics), you must declare it. Most standard businesses select None.
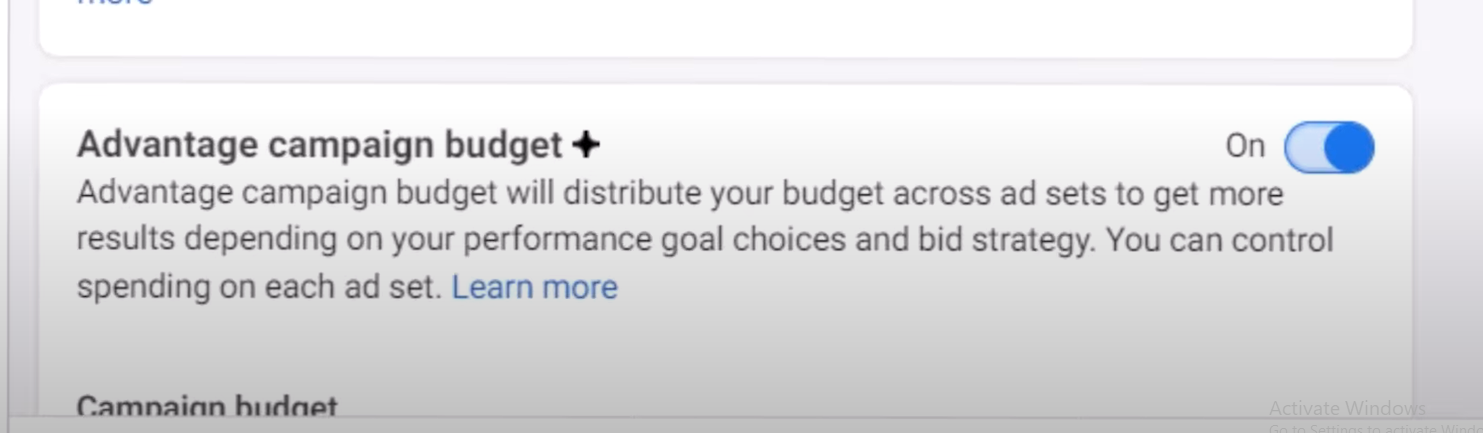
Turn on Advantage campaign budget (optional, good for beginners). This sets one overall budget at the campaign level and lets Meta allocate it between ad sets based on performance. It is useful when you want to test multiple audiences but do not know how much to give each.
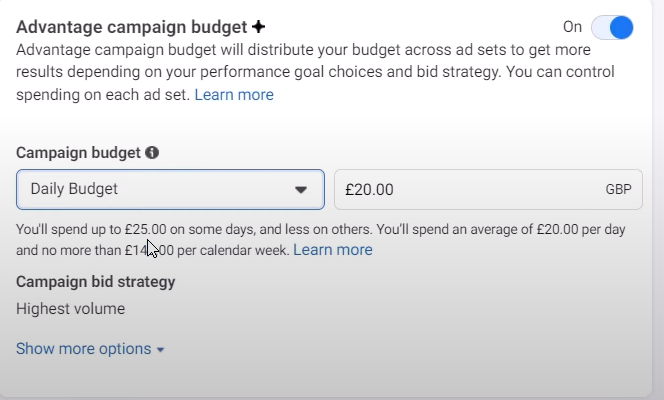
Set your budget. Choose a daily budget (for example $10 a day) or a lifetime budget (for example $300 over 30 days). For beginners, start with a daily budget you are comfortable spending while learning, around $5 to $20 a day.
After creating the campaign, you drop into the Ad Set level, which decides who sees your ads, where they see them, and how Meta optimizes delivery.
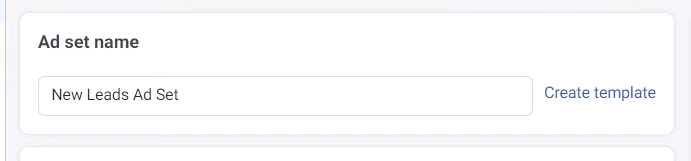
Name your Ad Set descriptively, for example UK-25-55-SMB-Owners-Interest:Entrepreneurship.
Choose where conversions happen. Under Conversion, select Website if you are sending people to a landing page or store. As your flow evolves, you can later test leads or conversions inside Instagram DMs instead.
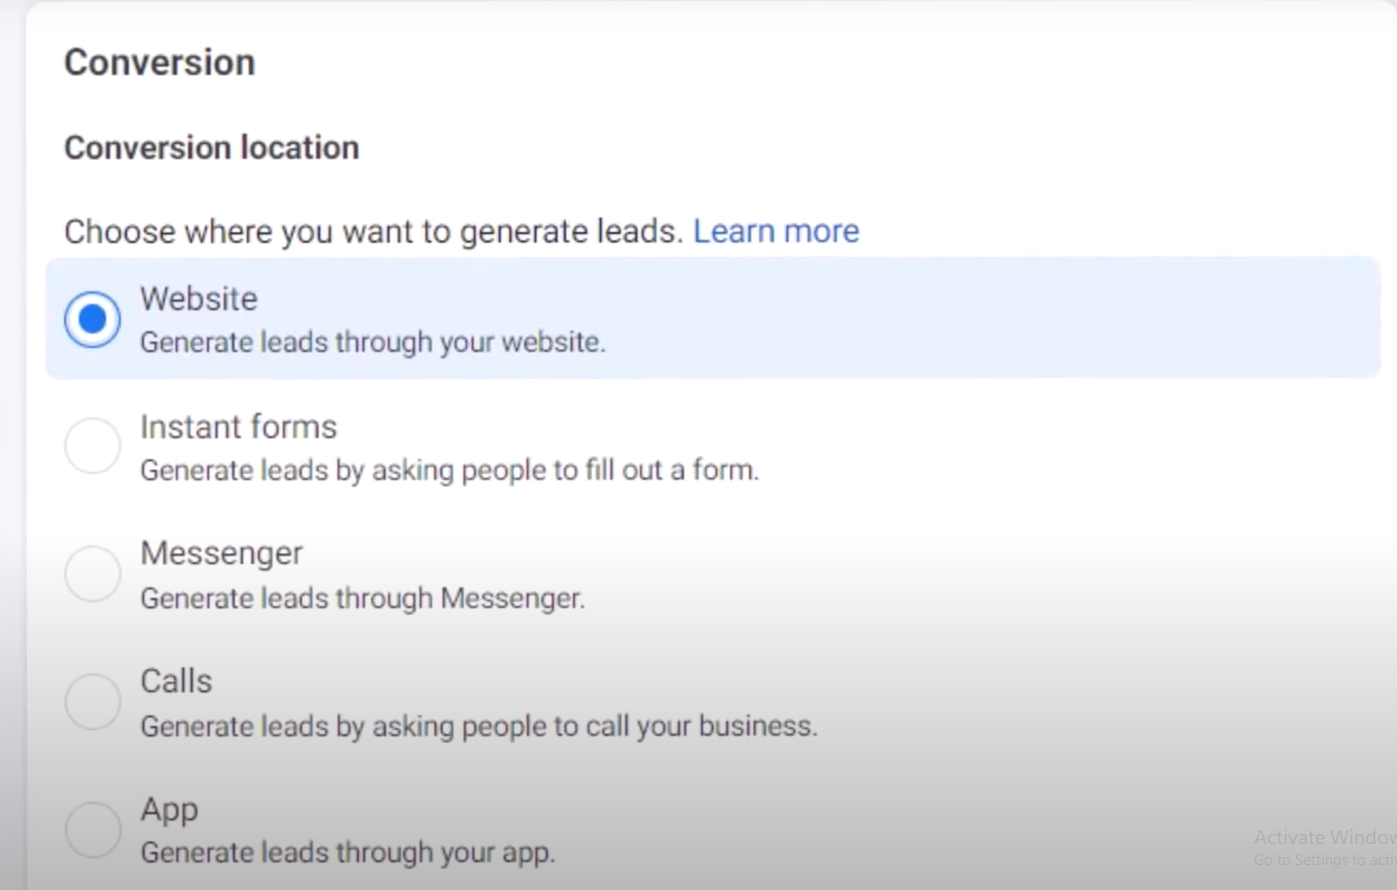
Make sure your website has a Meta Pixel installed (now part of the Meta Pixel and Conversions API setup) so Ads Manager can track performance.
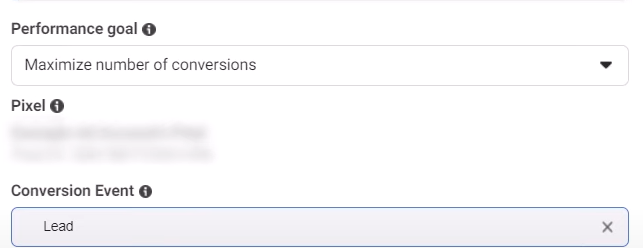
Set your performance goal. For performance campaigns, choose Maximize conversions, which tells Meta to optimize for people likely to complete your chosen action, such as a form submission or purchase.
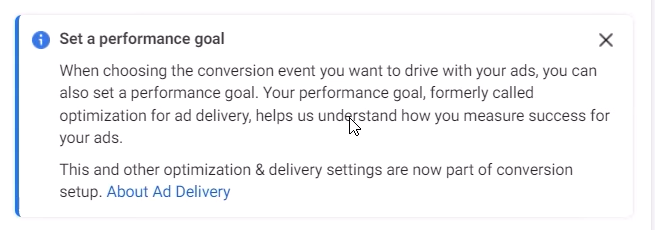
Set your conversion event to a meaningful action like Lead or Purchase (use Add to Cart only as a learning step if you do not have much purchase volume yet). As a beginner, ignore Cost per result goal and Dynamic creative for now, and focus on good creative, clear audiences, and enough budget.
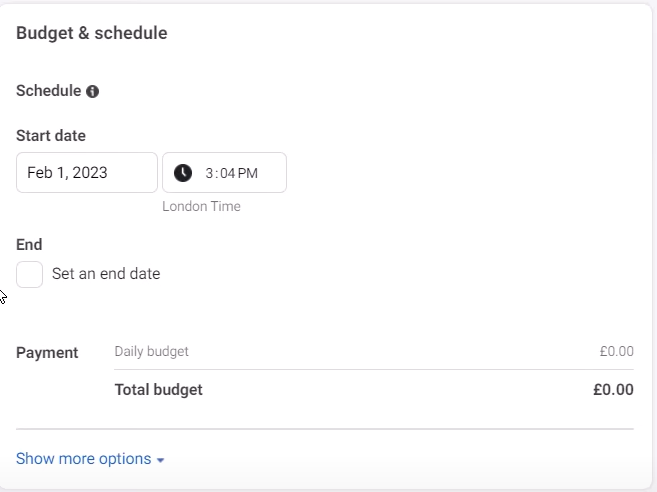
Set your schedule. The default start date is now. You can set an end date, but many advertisers keep it open-ended and pause manually, since ads often improve after the learning phase.
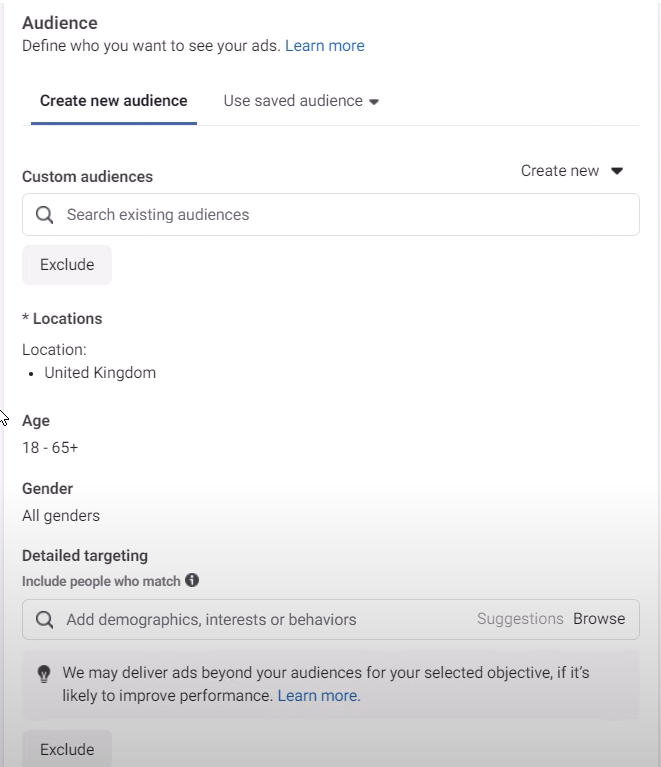
Define your audience. Watch the audience size gauge on the right and aim for something not too narrow and not too broad, often a few hundred thousand up to a couple of million people depending on your market. Set your location and radius, an age and gender range that matches your ideal customer, and the right languages. For detailed targeting, a smart beginner tactic is to use one primary interest per Ad Set, one targeting "Small business owners," another "E-commerce," another "Interior design," so you can see which interests convert.
Choose placements. Select Manual placements, choose Instagram only under Platforms (you can add Facebook later once you understand performance), and for Instagram start with Feeds, Stories, and Reels.
Now you are at the Ad level, where you design what people actually see.
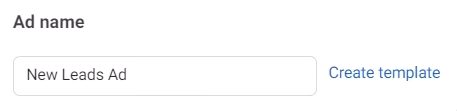
Name your ad descriptively, for example Reel-UGC-Offer10Off or Static-Image-BeforeAfter.
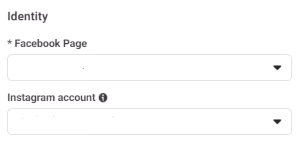
Set your identity. Make sure your Instagram account (and Facebook Page, if needed) are connected and selected as the identity for the ad.
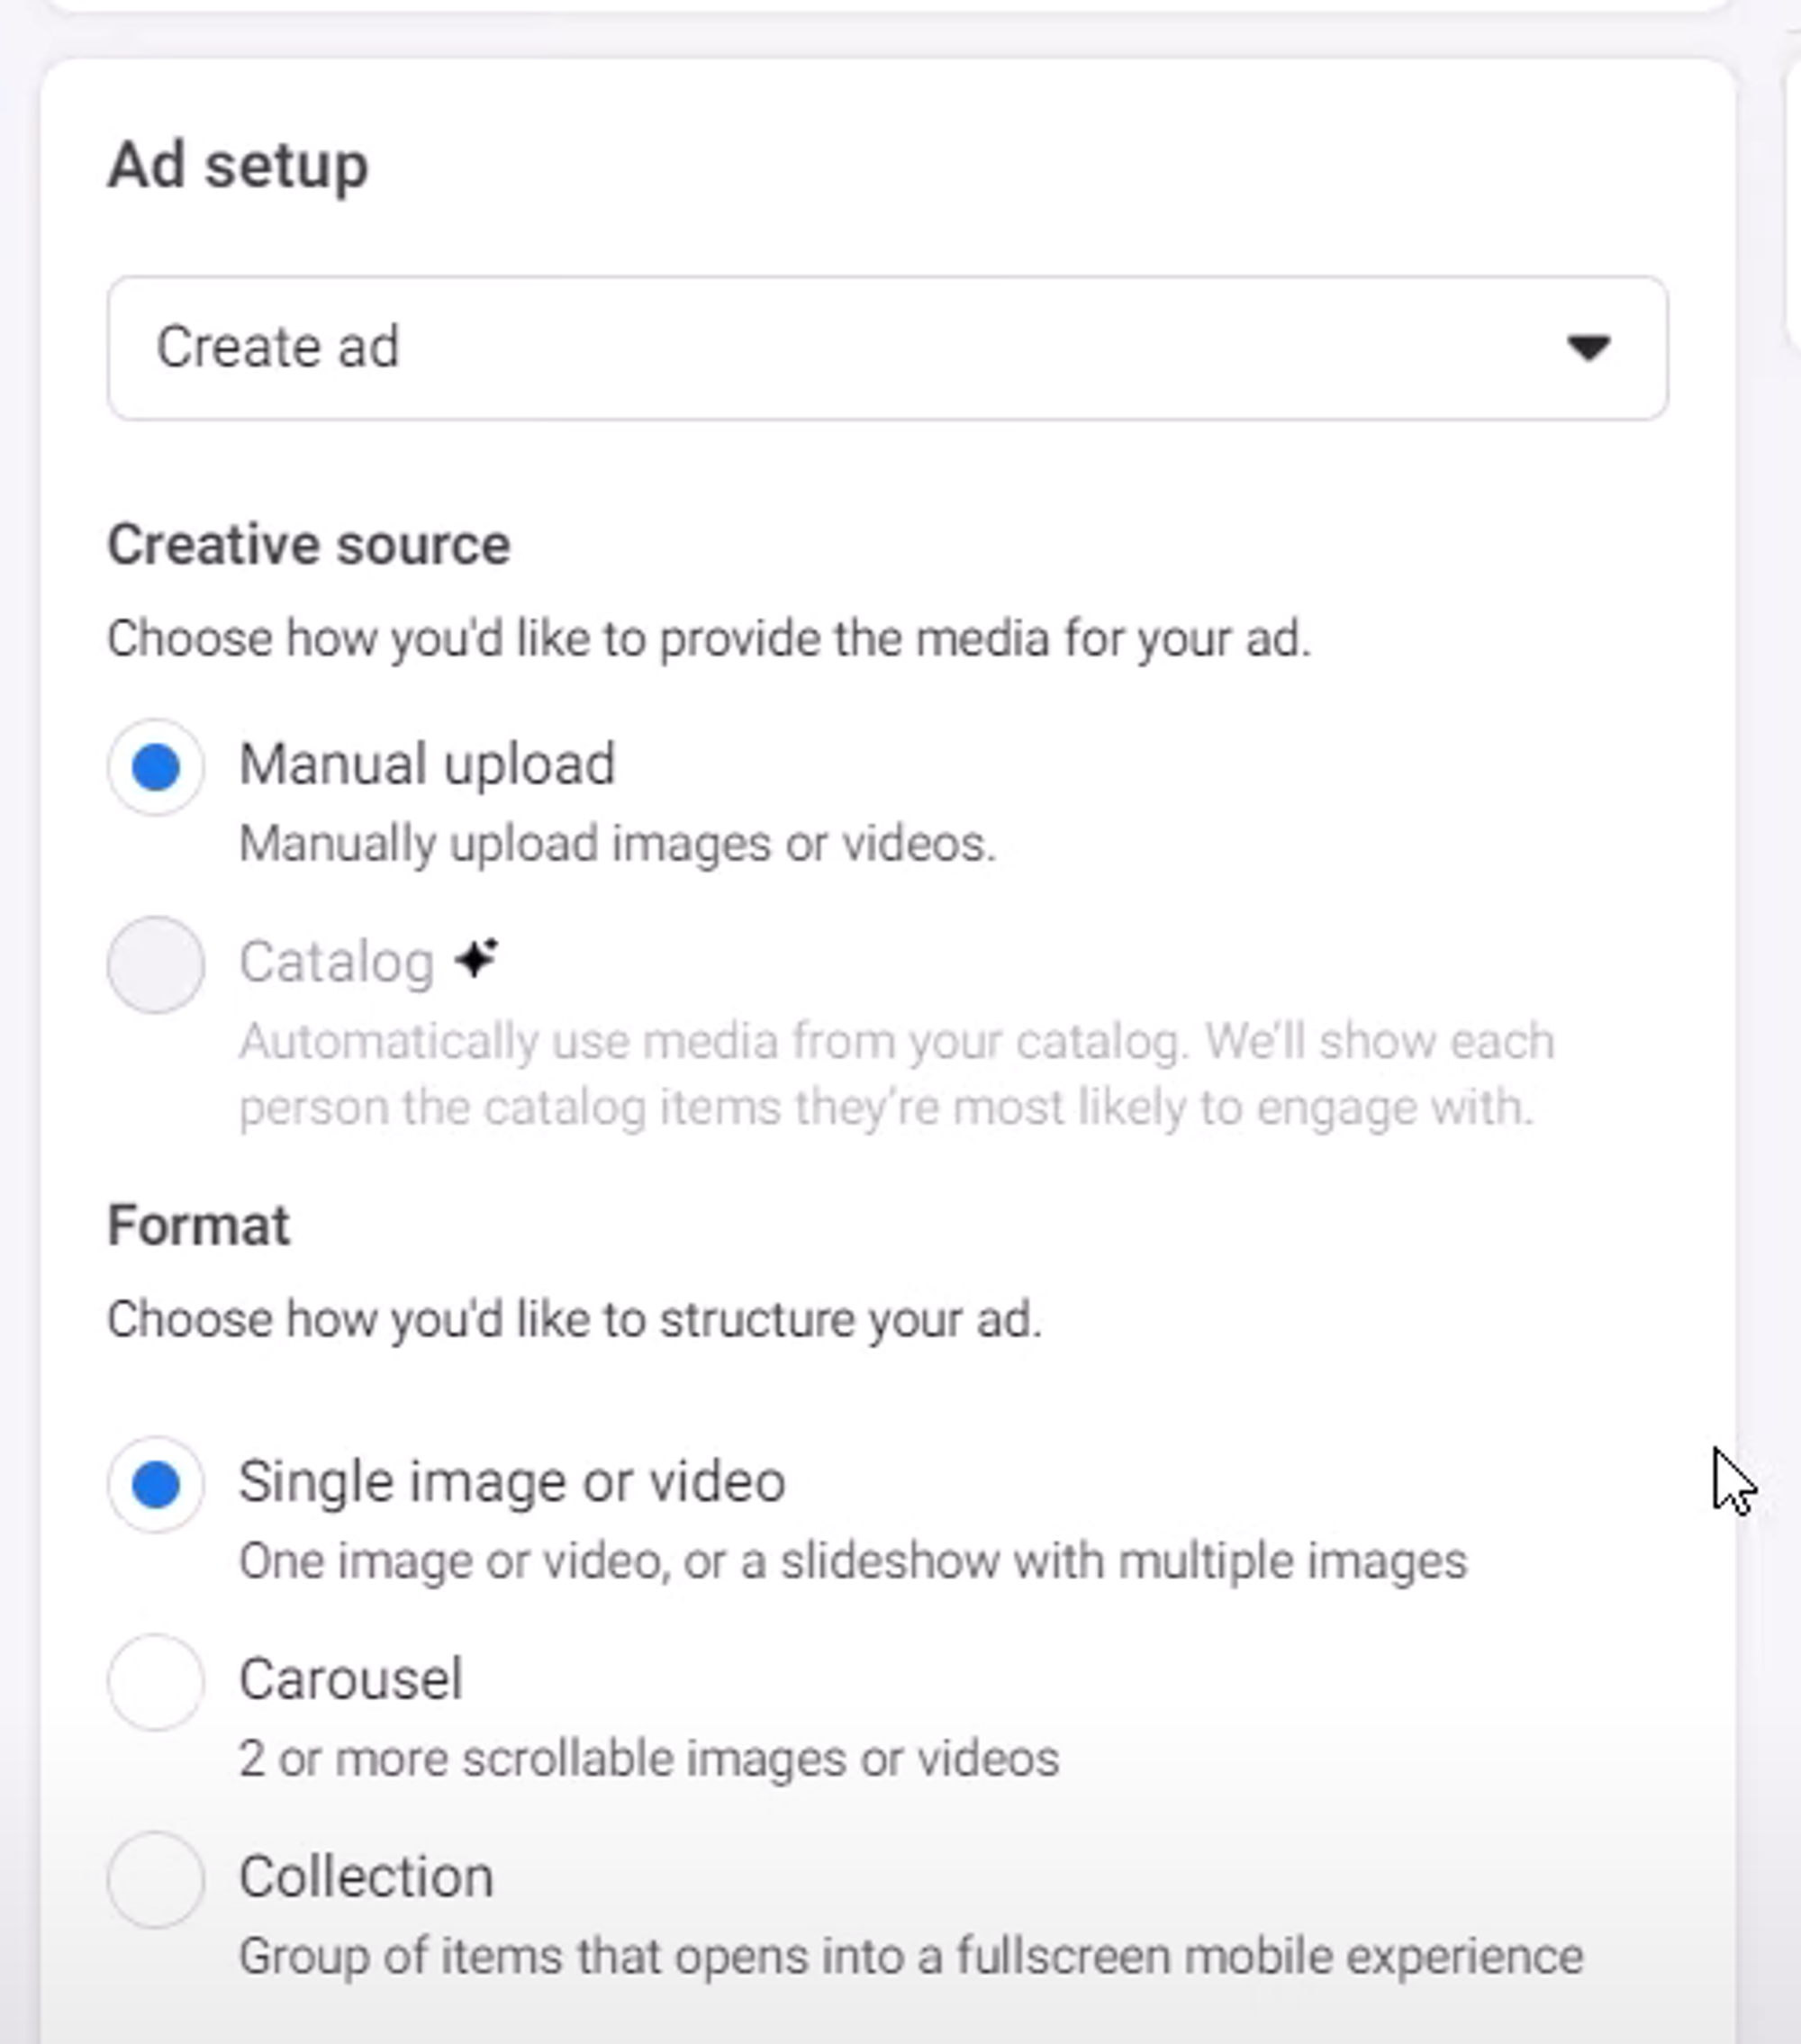
Set up the ad. Choose Create ad, set Creative source to Manual upload, and pick a format: single image or video, carousel, or collection.
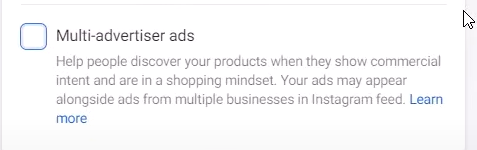
Turn off Multi-advertiser ads for now. This keeps your ad focused on your brand rather than appearing in mixed recommendation blocks.
Upload your creative. Fill as much of the screen as possible, especially for Stories and Reels. Upload your image or video, then use the crop tool to adapt to each placement: 1:1 or 4:5 for Feed, 9:16 full-screen vertical for Stories and Reels.

Write your copy. In the primary text, explain the benefit clearly, add the key details, keep it reasonably short, and use words your audience would actually search for. Write a short, punchy, benefit-focused headline, for example "Automate your Instagram DMs in 5 minutes," and an optional supporting description line if one is shown.
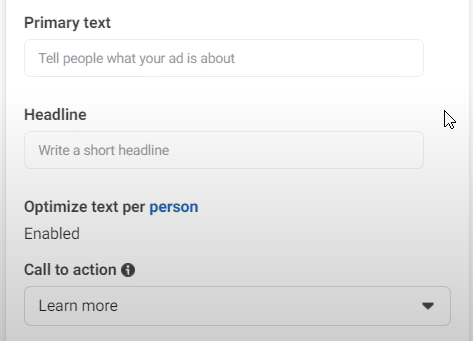
Choose your call to action. Pick the CTA that matches the next step: Learn more for guides or SaaS, Shop now for e-commerce, Sign up for trials or newsletters, or Send message if you want people to DM you directly.

Check your preview and publish. Preview the ad in Feed, Stories, and Reels, make sure the creative and text look right in each, and click Publish. Your campaign is now live.
A few simple rules save a lot of money early on. Start simple: one campaign, two to four ad sets, one or two ads per ad set is plenty to begin with. Test one variable at a time, change just the audience or just the creative between ad sets, not everything at once. Give the algorithm time, letting ads run several days and gather a meaningful number of results before making big decisions. Watch the metrics that matter for performance (cost per result, conversion rate, return on ad spend) rather than CTR or likes alone. Then iterate on winners: turn off underperforming ad sets and duplicate and tweak the ones that work.
Setting up ads is only half the story. The real leverage comes when you turn that paid traffic into conversations and leads inside Instagram DMs, which is where Inrō fits into an ad strategy. Instead of sending everyone to a landing page, you can use the Send Message objective so people start a chat with your brand directly, then let automation welcome them, answer questions, and guide them through the funnel without you typing every reply. The full setup is covered in turning ad leads into DM conversations.
It also catches the people who comment on ads instead of clicking, the "Price?" and "Does this work in my country?" comments. With comment-to-DM automation, everyone who comments a keyword gets an instant DM with a link, discount, or answer, and can be followed up a day or two later. The mechanics are the same as any Instagram auto DM.
Because every person who interacts with an ad can be tagged by campaign and offer, you build a segmented list as the ads run: everyone who asked about pricing but did not buy, everyone from a specific ad set, and so on. You can then send DM campaigns to just those segments. The broader capture-and-qualify picture is in social media lead generation and qualifying Instagram leads. All of it runs on Meta's official API, replying only to people who engaged with your ad, which keeps the account safe.
Every DM, comment and Story reply your ads generate triggers an automatic follow-up, so no paid lead gets missed. Free plan, no card.


There is no fixed price. Instagram ads run on an auction, and cost per click and cost per thousand impressions vary widely by industry, audience, region, and time of year. A practical starting point is $5 to $10 per day per ad set, enough to give the algorithm data to optimize on.
Yes for most businesses, especially those selling physical products, services with a defined audience, or brands that use DM conversations as part of their sales process. It works less well for very low-margin products where the cost per acquisition exceeds the profit.
Yes. You can start with as little as $5 a day. The trade-off is that learning takes longer at lower budgets, so give any new ad set at least five to seven days and a meaningful number of results before drawing conclusions.
No. Paid placements require spend. Organic content, Reels, and engagement are free, but they are not the same as advertising. What you can do for free is capture and convert the traffic your ads generate, using DM automation on a free plan.
There are eight: photo, video, carousel, Stories, collection, Explore, Shopping, and Reels ads. For beginners, start with a single image or video in Feed and Reels placements.
Tap Boost Post on any feed post, Reel, or Story from your profile. For the best targeting and to avoid Apple's 30% service fee on iOS, boost from instagram.com or use Meta Ads Manager instead of the app.
Creative fatigue in competitive niches, a learning phase that needs budget before results stabilize, cost-per-acquisition challenges for low-margin products, and the gap between ad click and purchase when traffic goes to a website with no follow-up. That last one is the most fixable: sending clicks and comments into DMs closes the gap.
It refers to video: if your Reel or video ad does not capture attention in the first three seconds, most viewers scroll past. Open with something immediately interesting, a strong visual, a question, or an unexpected moment.
Start with a single image. It is faster to produce, easier to iterate, and gives cleaner data because there is one variable. Once a message converts as an image, test the same message in video or Reel format.
Yes, when using a tool built on Meta's official API. A Meta-approved platform can automate DM responses triggered by ad comments within Instagram's platform policies, because it only messages people who engaged with your ad first.
Join automations strategies and Instagram Insights weekly
By entering your email address above and clicking Subscribe, you consent to receive marketing communications (such as newsletters, blog posts, event invitations and new product updates), and targeted advertising from Inrō from time to time. You can unsubscribe from our marketing emails at anytime by clinking on the "Unsubscribe" link at the bottom of our emails. For more information about how we process personal information and what right you have on this respect, please see our Privacy Policy.
Connect your Instagram account and build your first automation in minutes. No code required.
.avif)