Instagram Ads for Beginners: Setup, Cost & DM Funnels
Learn how to set up Instagram ads step by step, how much they cost, and how to turn clicks into automated DM conversations and leads with Inrō.
Table of content
Share this article
TL;DR
TL;DR
Instagram ads are paid posts that appear in feeds, Stories, Reels, Explore and more, labeled with a small “Sponsored” tag.
They work: Meta-commissioned studies and recent analyses show that around half of users have made a purchase after seeing a product on Instagram.
Costs depend on your bidding, audience, industry and goal, but most experts suggest starting at $5–10 per day per ad set so the algorithm has enough data.
You create ads through Meta Ads Manager in three layers: Campaign → Ad Set → Ad.
For beginners:
Campaign objective: Leads or Sales, not just Awareness
Optimization: Maximize conversions
Placements: Start with Instagram Feed, Stories & Reels
To get real ROI, send people into Instagram DMs, where you can have 1:1 conversations and capture leads.
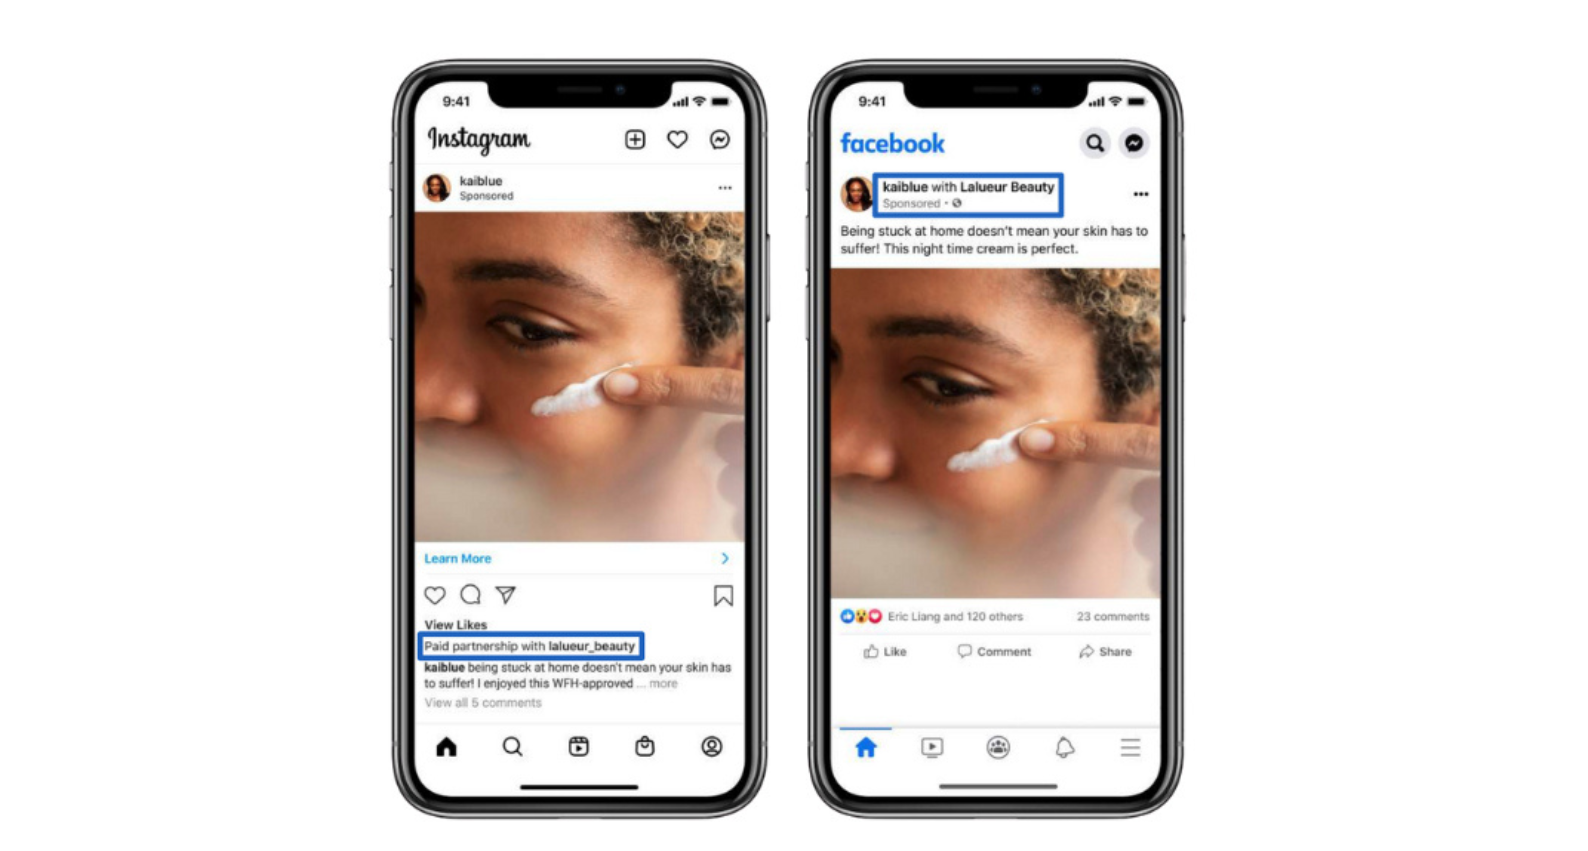
Instagram ads are paid posts that businesses can show to specific target audiences on Instagram. They appear almost like regular content, inside:
Feed
Stories
Reels
Explore
Shopping / Collection placements
The only clear visual difference is the small “Sponsored” label under the account name.
Instagram supports several ad formats:
Single image / photo ads
Video ads
Carousel ads (multiple images/videos)
Collection ads (especially for e-commerce)
Story ads
Reels ads
Explore ads
Shopping ads with product tags
This flexibility means you can design ads around your strongest asset, whether that’s a single hero product, a whole collection, or a quick story-style video.
Are Instagram ads effective?
Short answer: yes, if you target well and send users to the right next step.
Meta-commissioned research and recent marketing studies show that:
Around 54% of people surveyed say they’ve made a purchase either in the moment or later after seeing a product or service on Instagram.
People increasingly use Instagram to discover products, research brands and click through for more information.
Instagram ads perform especially well when they:
Show up in native formats (Reels / Stories content that feels like normal posts)
Target a clear, specific audience
Ask for a simple, low-friction action (e.g., “DM us ‘QUOTE’ for a custom offer” instead of “Buy now” on cold traffic)
And this is where DMs become powerful: instead of pushing everyone to a generic landing page, you can invite them to start a conversation, exactly what Inrō is built to automate.
How much do Instagram ads cost?
There’s no fixed price list. Instagram ads run on an auction system, meaning your costs depend on:
Your objective (Sales/Leads often cost more than Reach)
Audience size and competition (e.g., US vs. smaller markets)
Industry competitiveness
Time of year (Q4 is usually more expensive)
Your bidding strategy and budget
Many performance marketers suggest:
$5–10 per day per ad set at minimum, simply to give the algorithm enough data
Higher budgets for faster learning and more stable results
You can choose between:
Daily budget: Meta spends up to that amount per day
Lifetime budget: Meta spreads a total amount over the campaign duration
For beginners, a daily budget is easier to control and understand—something like $5–20 per day while you learn.
How to set up Instagram ads (Step-by-step)
You’ll be working inside Meta Ads Manager, which controls both Facebook and Instagram ads.
Part 1 – Create your campaign
Set up / log into a Meta Business Account Go to business.facebook.com, create or log into your Business Manager, and make sure your Instagram account and Facebook Page are connected.
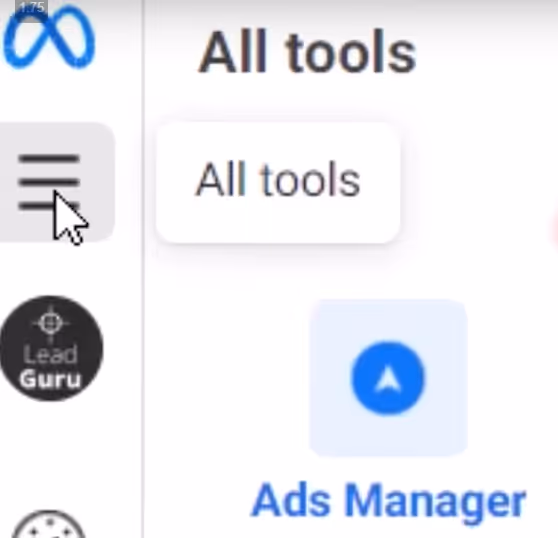
1. Open Ads Manager
In Business Manager, click the menu icon (three lines) on the left.
Select Ads Manager.
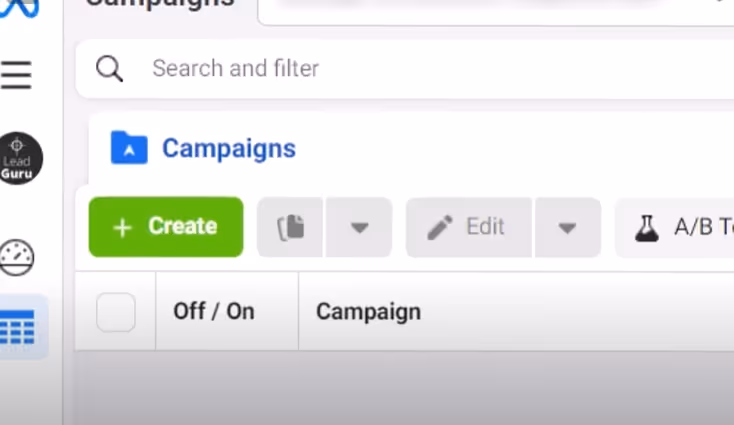
2. Click the green “Create” button
This starts a new campaign flow.
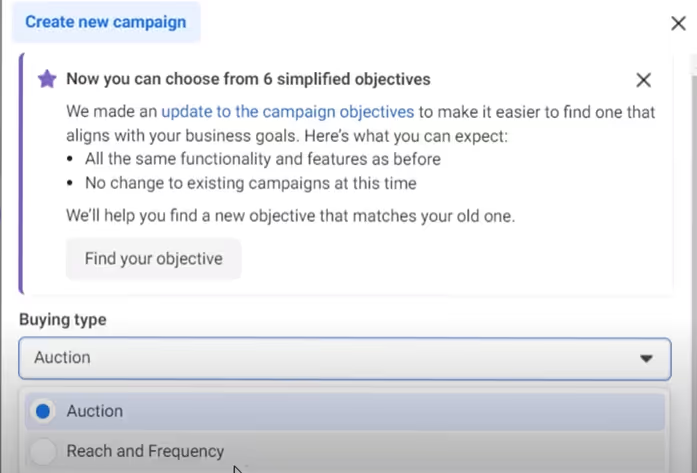
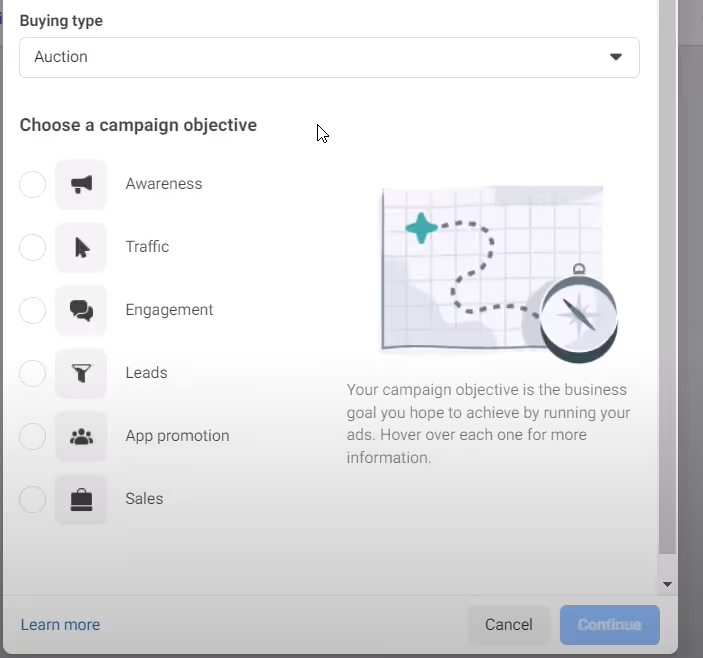
3. Choose your buying type: “Auction”
For small and medium businesses, the Auction buying type is the standard and most flexible option.
4. Select your campaign objective
Meta will show options like:For most business owners, it’s better to choose Leads or Sales over pure Awareness. This tells the system you care about conversions, not just impressions.
Awareness
Traffic
Engagement
Leads
App promotion
Sales
5. Name your campaign
Use a clear naming convention like: IG-Conversions-Q1-2025-LeadGen or IG-Sales-US-Remarketing.
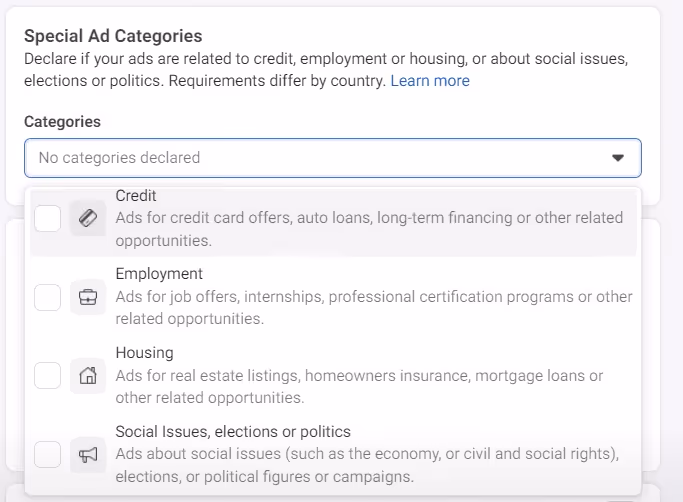
6. Choose a category (if required)
If you’re in a special ad category (credit, housing, politics, etc.), you must declare it. For most standard businesses, you’ll select “None”.
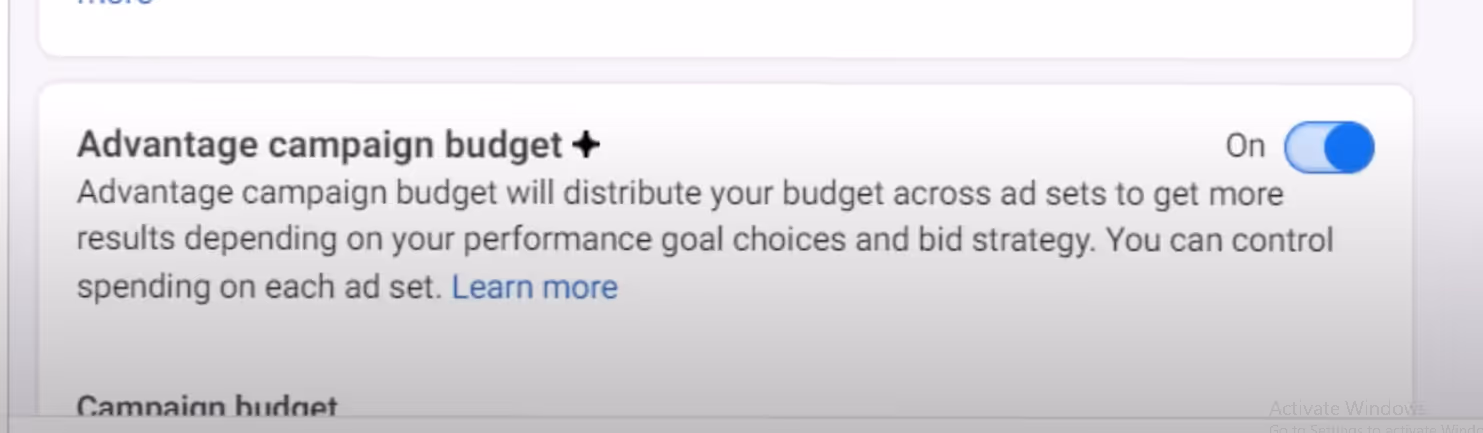
7. Turn on “Advantage campaign budget” (optional, but great for beginners)
This lets you set one overall budget at the campaign level.
Meta then decides how to allocate it between different ad sets based on performance.
It’s perfect when you want to test multiple audiences but don’t know how much to give each one.
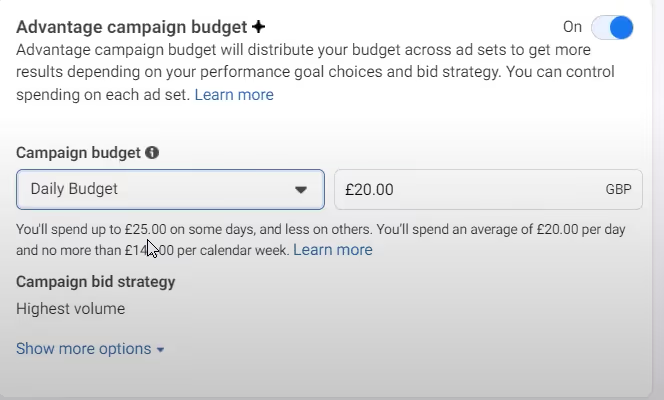
8. Set your budget
Decide between:For beginners, start with a daily budget you’re comfortable with losing while you’re learning—something in the $5–20/day range.
Daily budget (e.g., $10/day)
Lifetime budget (e.g., $300 over 30 days)
Part 2 – Set up your Ad Set (audience, placements, optimization)
After creating a campaign, you’ll drop into the Ad Set level. Think of an Ad Set as:
“Who sees my ads, where they see them, and how Meta optimizes delivery.”
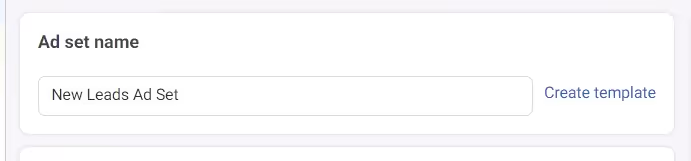
Name your Ad Set
Use something like: UK-18-65-SMB-Owners-Interest:Entrepreneurship.
Choose where conversions happen
Under Conversion, select:
Website if you’re sending people to a landing page or store
(Later, you can test leads or conversions inside Instagram DMs as your flow evolves)
Make sure your website has a Meta Pixel(now part of the Meta Pixel / Conversions API setup) so Ads Manager can track performance.
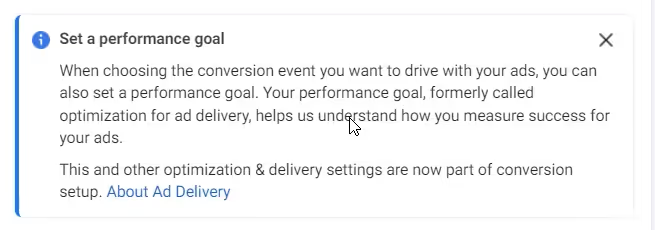
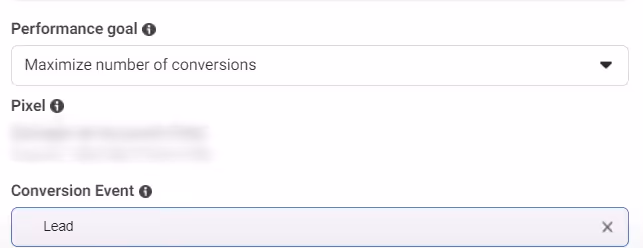
Set your performance goal
For performance campaigns, choose “Maximize conversions”.
This tells Meta to optimize for people who are likely to complete your chosen action (e.g., form submission, purchase).
Set your conversion event
Under Conversion event, choose a meaningful action like:
Lead
Purchase
Add to Cart (only as a learning step if you don’t have much purchase volume yet)
Ignore “Cost per result goal” and “Dynamic creative” for now
As a beginner, focus on simply:
Good creative
Clear audiences
Enough budget
Once you’re comfortable, you can experiment with cost caps and dynamic creative later.
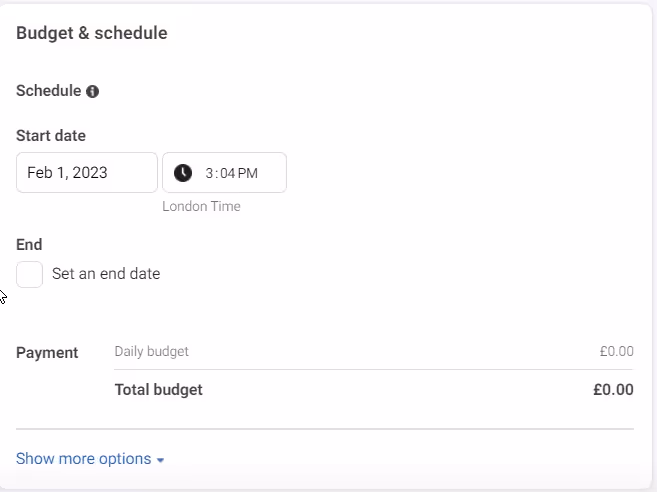
Set schedule (start and end)
Default start date = now.
You can set an end date, but many advertisers prefer to keep it open-ended and manually pause when needed, since ads often improve after the learning phase.
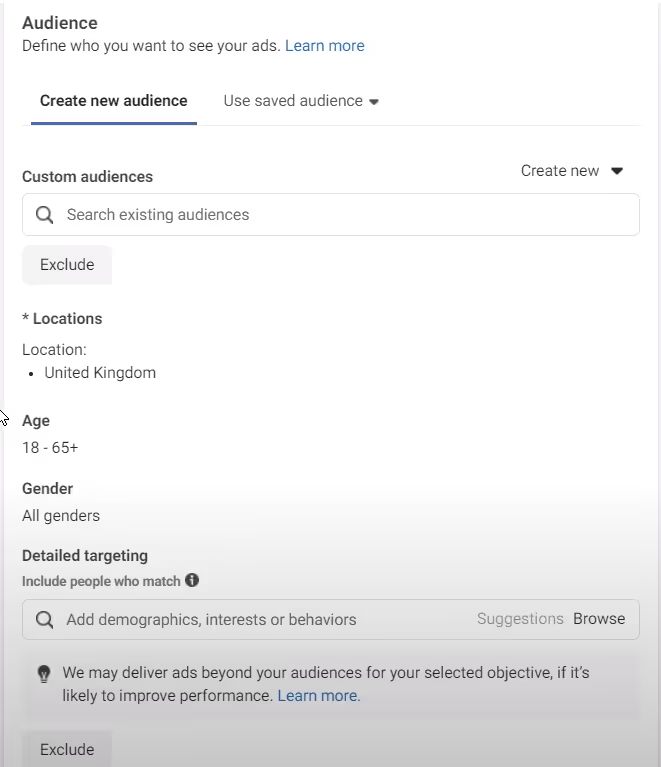
Define your audience
Meta will show you an audience size gauge on the right. Aim for something not too narrow, not too broad—usually a few hundred thousand up to a couple of million people, depending on your market.
Location: Choose your target country/region and radius.
Age & gender: Set ranges that match your ideal customer (e.g., 25–55).
Languages: Align with your audience (e.g., English, French, etc.).
Detailed targeting:For beginners, a smart tactic is to:
Start with one primary interest per Ad Set
Example: One Ad Set targeting “Small business owners”, another “E-commerce”, another “Interior design,” etc.
This makes it much easier to see which interests convert.
Choose placements
These are the main surfaces where people scroll and engage regularly.
Under Placements, select Manual placements.
Under Platforms, choose Instagram only (you can add Facebook later once you understand performance).
For Instagram placements, start with:
Feeds
Stories
Reels
Part 3 – Create the Ad (creative, copy, CTA)
Now we’re at the Ad level. This is where you design what people actually see.
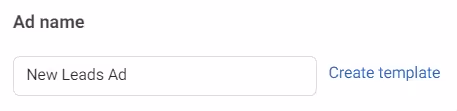
Ad name
Use something like: Reel-UGC-Offer10Off or Static-Image-BeforeAfter.
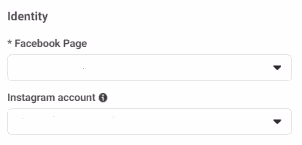
Identity
Make sure your Instagram account (and Facebook Page, if needed) are connected and selected as the identity for the ad.
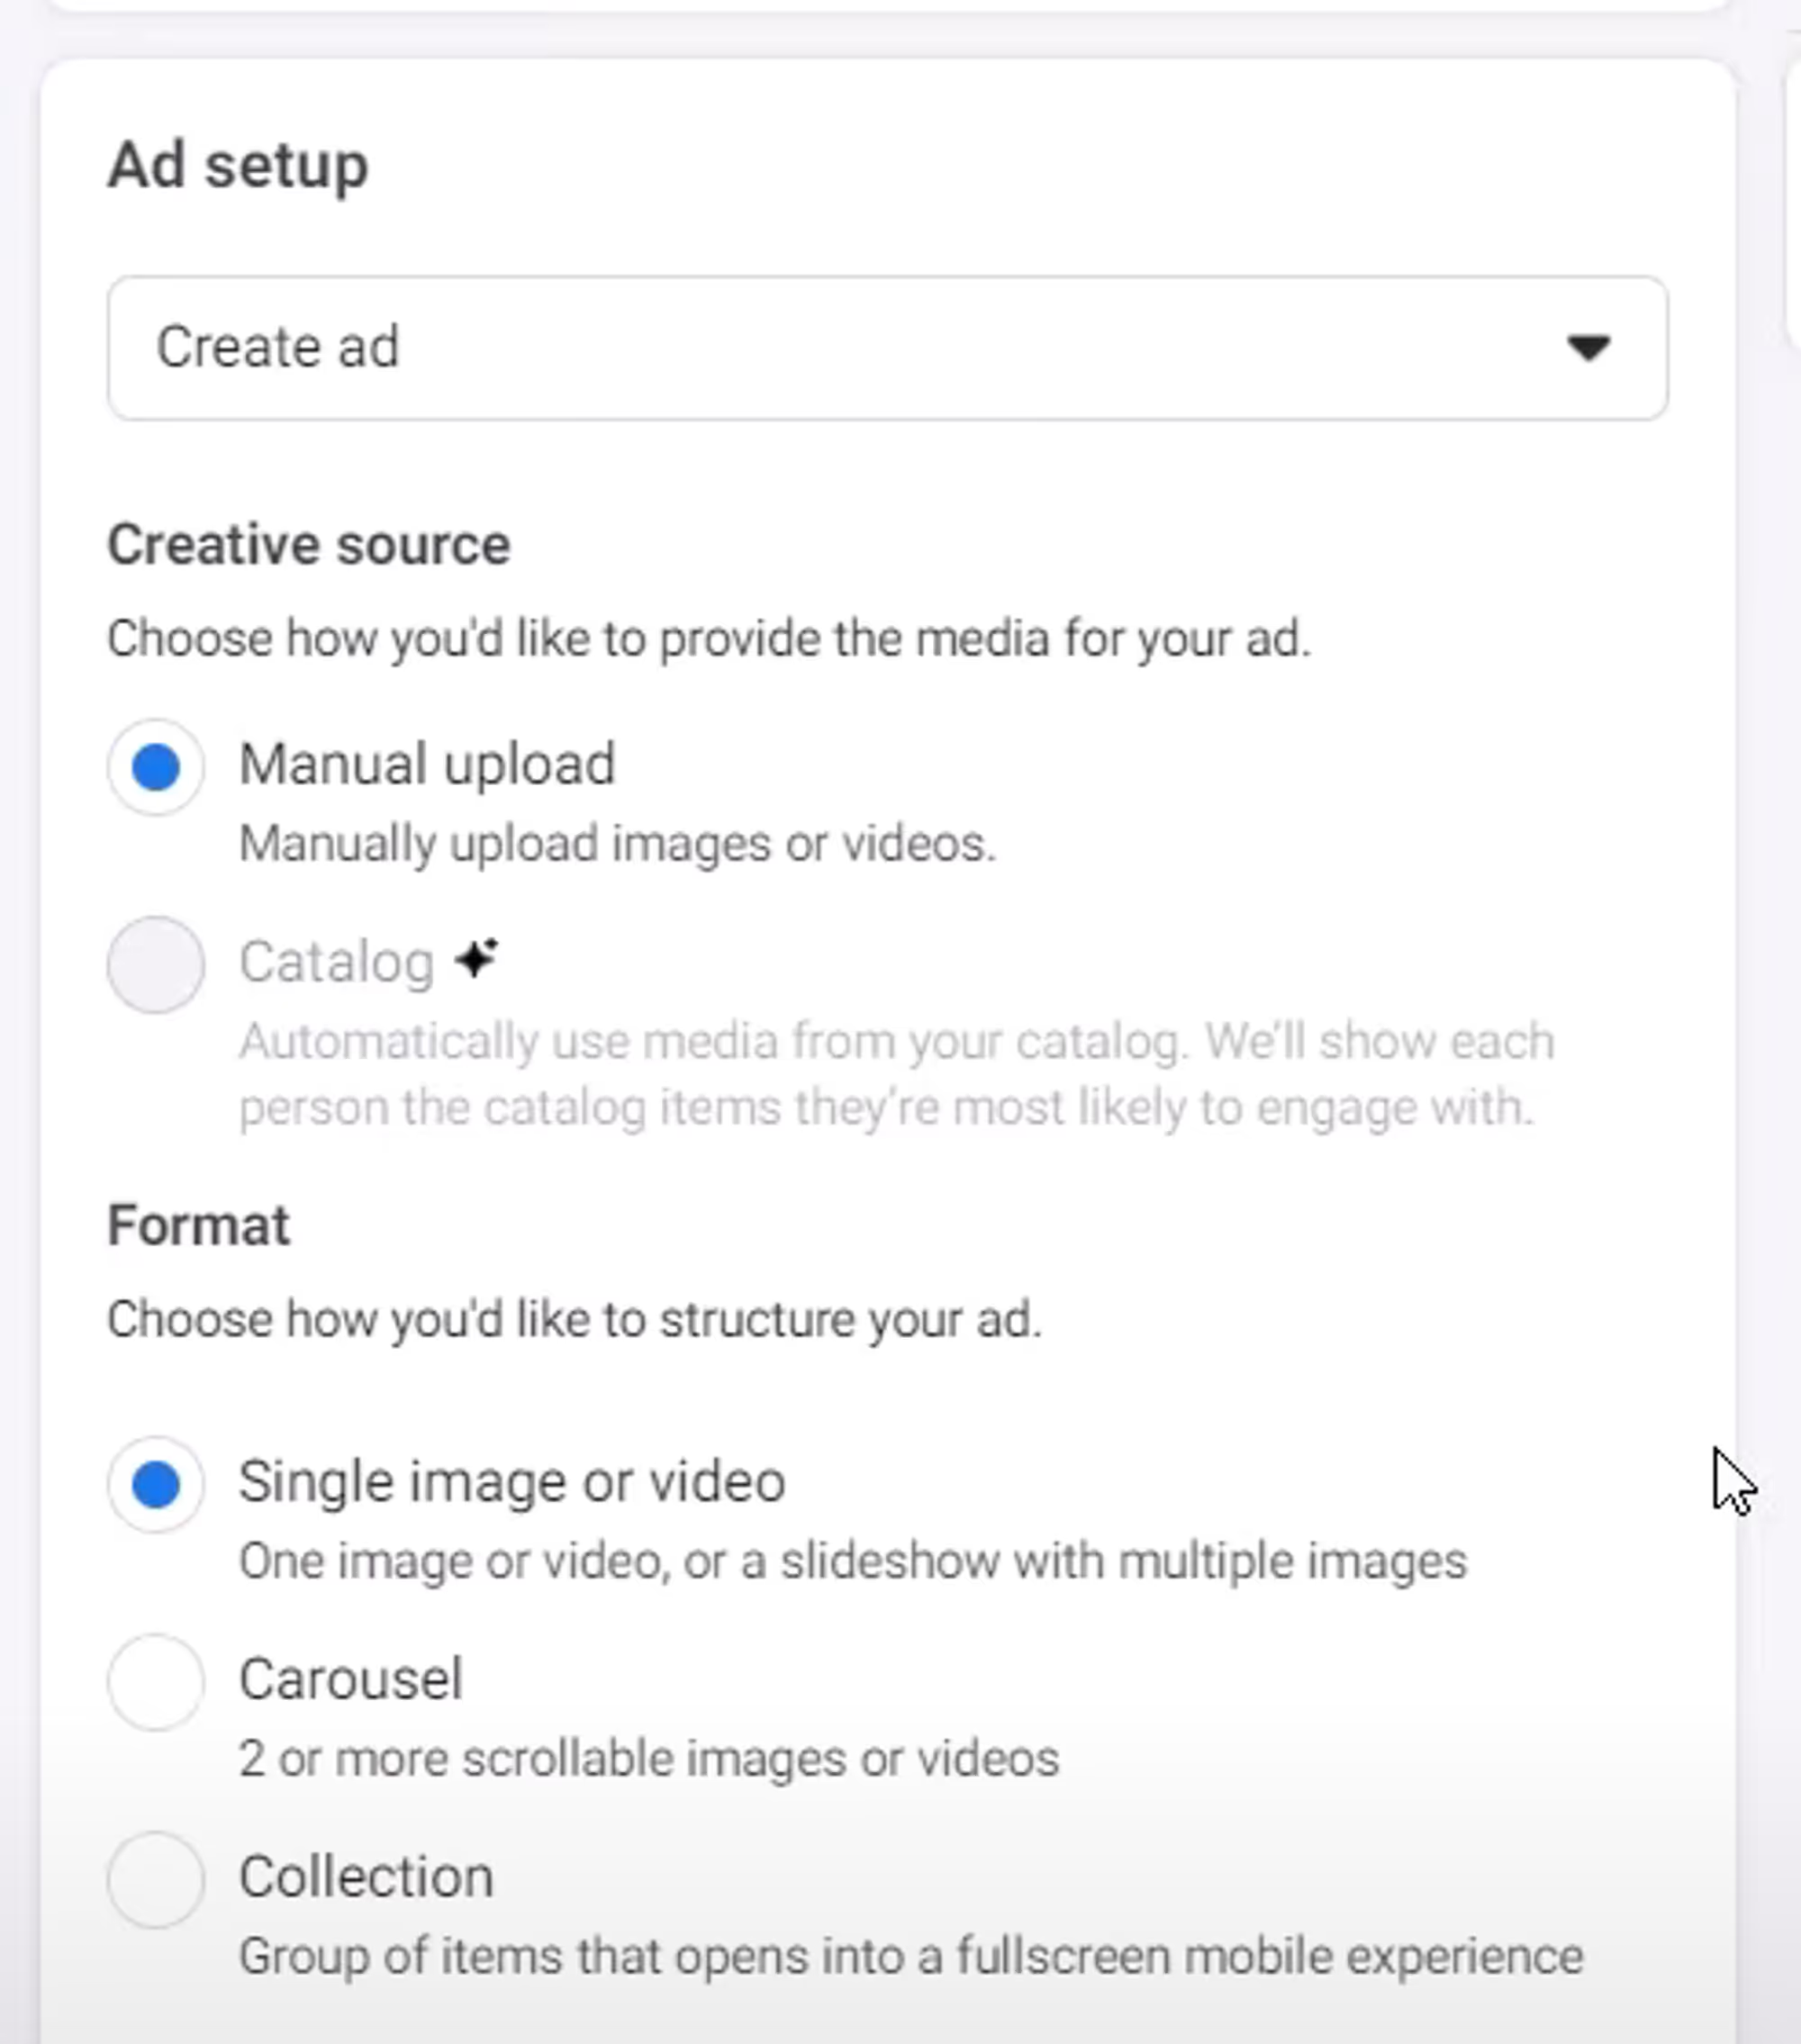
Ad setup
Choose “Create ad”
Under Creative source, choose Manual upload
Under Format, select:
Single image or video
Carousel
Collection
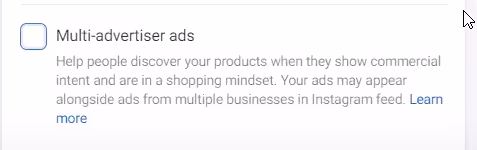
Turn off “Multi-advertiser ads” (for now)
This keeps your ad focused on your brand without appearing in mixed recommendation blocks.
Upload your creative
Try to fill as much of the screen as possible, especially for Stories and Reels, to be more eye-catching.
Upload your image(s) or video(s) (JPG/PNG for images).
Use the crop tool to adapt to each placement:
Feed: 1:1 or 4:5
Stories & Reels: 9:16 (full-screen vertical)
Optimize your media (optional, but helpful)
Use Meta’s basic editing:
Standard enhancements
Brightness & contrast tweaks
Optional music or simple animations
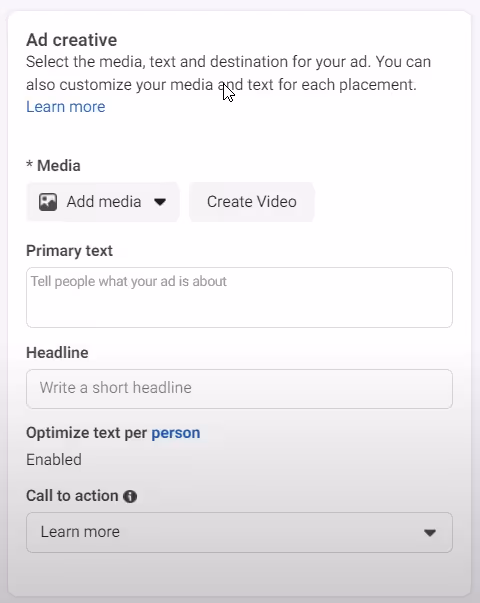
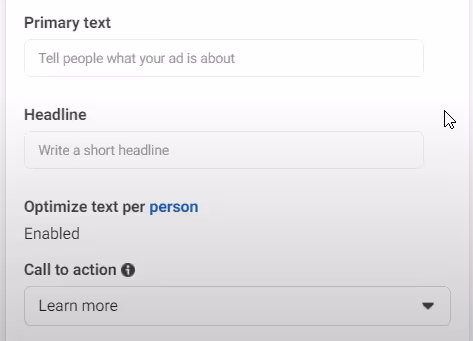
Write your copy
Primary text (caption):
Explain the benefit clearly
Add key details about your product/service
Keep it under ~10 sentences
Use clear keywords your audience would search for (e.g., “Instagram DM automation for small businesses”)
Headline:
Short, punchy, and benefit-focused
Example: “Automate Your Instagram DMs in 5 Minutes”
Description (if shown): Optional supporting line.
Choose your Call to Action (CTA)
From the CTA dropdown, select something that matches the next step:
Learn more – for educational offers, guides, or SaaS
Shop now – for e-commerce
Sign up – for webinars, SaaS trials, newsletters
Send message – if you want people to DM you directly
Check your preview & publish
Preview your ad in Feed, Stories, Reels.
Make sure the creative and text look good in all placements.
Click Publish.
You’ve now launched your Instagram ad campaign.
Best practices so you don’t burn your budget
A few simple rules can save you a lot of money early on:
Start simple
1 campaign, 2–4 Ad Sets, 1–2 ads per Ad Set is plenty to begin with.
Test one variable at a time
Change just the audience or just the creative between Ad Sets—not everything at once.
Give the algorithm time
Let ads run for a few days and gather at least 50–100 conversions per week (if possible) before making big decisions.
Watch the right metrics
For performance: Cost per result, conversion rate, ROAS, not just CTR or likes.
Iterate on winners
Turn off underperforming Ad Sets and duplicate + tweak the ones that work.
Turn your Instagram ads into DM funnels with Inrō
Setting up ads is only half the story. The real leverage comes when you turn that paid traffic into conversations and leads, right inside Instagram DMs.
Here’s how Inrō fits perfectly into your ad strategy:
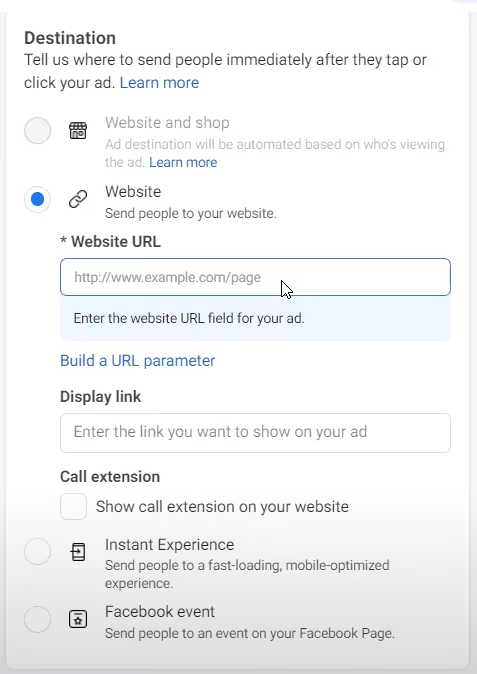
1. Send ad traffic straight into DMs
Instead of only using “Learn more” and sending people to a landing page, you can:
Use the “Send Message” or DM-centric objectives so people start a chat with your brand directly.
Pair that with Inrō’s AI Agent to welcome them, answer questions, and guide them through your funnel—without you manually typing every reply.
2. Automate replies to comments from your ads
Many users will comment on ads instead of clicking:
“Price?”
“Does this work in [country]?”
“Can I use this for my small business?”
With Inrō’s Comment → DM automation, you can:
Automatically send a DM to everyone who comments with a keyword or question.
Deliver a link, discount, or quiz through DM, where it feels more personal.
Use time delays and follow-up sequences to check back in after a day or two.
3. Tag and segment leads by campaign or offer
Inrō includes an Instagram-first CRM, which means:
Every person who interacts with your ad can be tagged (e.g., source: IG-Ads-LeadGen, campaign: Q1-IntroOffer).
You can create segments based on:
Which ad they came from
Their answers in the DM flow
Their actions (clicked link, requested demo, etc.)
Later, you can send DM campaigns only to those segments—for example:
All people tagged from a specific ad set
Everyone who asked about pricing but didn’t purchase
4. Let an AI Agent handle FAQs and pre-sales
Your ads will generate a lot of similar questions:
“How much is it?”
“Do you integrate with Shopify?”
“Is this good for solopreneurs?”
Instead of answering manually, Inrō’s AI Agent can:
Respond 24/7 in your brand’s tone of voice
Share the right link or offer automatically
Escalate complex questions to a human when needed
This turns Instagram into a scalable sales channel, not a never-ending inbox.
Conclusion
You now know:
What Instagram ads are and where they appear
Why they’re effective for product discovery and sales
How much they typically cost and how to budget
The exact step-by-step to create campaigns, ad sets and ads
How to avoid the most common beginner mistakes
The next step is making sure every click, comment and view from your ads has somewhere useful to go—and the best place is often a conversation in the DMs.
Try Inrō to boost your Instagram growth and sales.
Attract more leads, target them with DM campaigns, and automate your interactions on Instagram!
Join automations strategies and Instagram Insights weekly
Thank you! You have been susbcribed to our weekly insights!
Oops! Something went wrong while submitting the form.
By entering your email address above and clicking Subcribe, you consent to receive marketing communications (such as newsletters, blog posts, event invitations and new product updates), and targeted advertising from Inrō from time to time. You can unsubscribe from our marketing emails at anytime by clinking on the "Unsubscribe" link at the bottom of our emails. For more information about how we process personal information and what right you have on this respect, please see our Privacy Policy.
.avif)


.png)
.png)
.png)